SmartStellar
Manual

Star Chart Screen

Star Chart

The star chart screen is SmartStellar's main screen.

Double-tap
Centers the tapped position
Scroll
Scrolls the star chart
Pinch-in/pin-out
Zooms the star chart in and out.
Hold device above horizon line
This requires an Android device with built-in sensors. Orientation and acceleration sensors are automatically engaged to synchronize the star chart with the device's direction.
This function is only available when date and time are set to current.

Star Chart - Date & Time Setting

Select date and time

Current selected date and time are displayed at the top right. Tap on a unit to highlight and change settings.

[now] Tap on
Sets date and time to current and closes settings. The [now] is hidden when set to current.
Tap on Date and Time units
Tap to change the position number that is highlighted. If you tap again, the numbers have already been highlighted, to finish the change date and time
Single-tap
Close setting.
Scroll up and down
Increase or decrease the number of date and time that is currently highlighted. Down to increase, up to decrease.
Scroll left or right
Change the number is highlighted. Rightward (Year → month → day → hour → minute → second → Year...). Leftward is change to reverse.

Star Chart Buttons

[Search] button

[Search] button
Opens object Search screen.

[Animation] button

[Animation] button
Selects play, reverse play and speed of animations.

[Star Chart Setting] button

[Star Chart Setting] button
Opens the star chart settings screen.

[Program Setting] button

[Program Setting] button
Opens a screen from which to select program settings, such as Location, Time Zone, and others.

Object Search

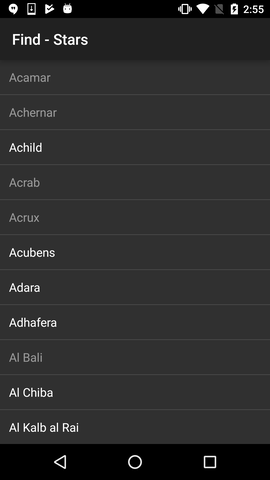
Select object

Select object name

Tap on the [Lupe] button on the star chart to open the search menu screen. Select a sought object from the associated sub-menu and return to the search menu. And so selected object will be centered on the star chart, if sensors are deactivated. If sensors are active, then a direction mark will be displayed to guide to the sought object.

Object Search displays the symbol and label of a found object even if that is currently deselected in Star Chart Settings. To remove a found object, tap again on the [Lupe] button on the star chart screen.

Animations

Tap on the [Play] button to show manual operation buttons for animations. Tap again to hide after setting is complete.

Reverse Play Button Reverse Stop Button

Reverse Play Button
Animates back into time.

Animation Set Button

Animation Set Button
Opens a screen from which to select animation speeds and intervals.

Play Button Reverse Stop Button

Play Button
Plays animations forward in time.

Star Chart Settings

Star chart setting display (Select settings)

Star chart setting display (Configuration settings)

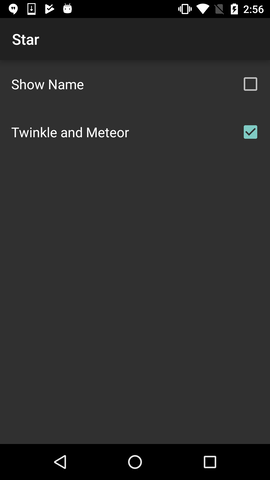
Tap on the [*] button on the star chart to open a menu from which to select or deselect objects to be displayed plus sky condition simulations (Background) and coordinate grids (Others).

Settings

Settings - Location

Settings Location display (Settings map)

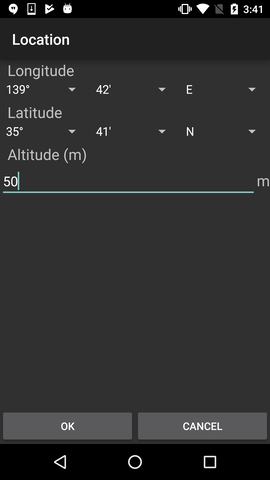
Settings Location display (Settings numeric input)

Tap on the [...] button to open the Settings menu and select “Location”.

Location settings can be made by the following means.

  • Rotate the Earth globe to the center of the desired location.
  • Tap on [GPS] to acquire GPS coordinates.
  • Tap on the coordinates button to provide coordinates manually.

Tap on [OK] to set and have the location reflect on the star chart. No changes will be made if you tap on [Cancel] or the device's Back button.

Settings - Time Zone

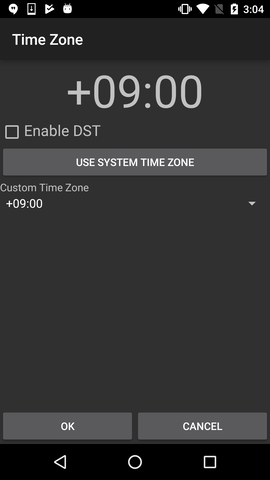
Setting timezone

Tap on the [...] button to open the Settings menu and select “Time Zone”.

Here you can select the System Time Zone or optionally pick one from a list of custom time zones.

If Daylight Saving Time, DST, is observed, tap on “Enable DST” to set the time zone an hour ahead.

Tap on [OK] to set and have the time zone take effect on the star chart. No changes will be made if you tap on [Cancel] or the device's Back button.